Windows 10X (Latest Build)

Run Windows 10X on Your PC (2021)
Here, we have explained all the steps in great detail so anyone can run Windows 10X Build 20279 on their PC. I would recommend you to go through all the points to get a better idea about the installation process.
Things to Know
- We are not going to install Windows 10X on physical hardware as the ISO image is not out yet. However, we can try the nearly-final build of Windows 10X through a virtual machine. Unlike the official emulator, the performance is much better on the virtual machine.
- We are going to use a VHDX file (Hard disk image file) which can only be used on Microsoft’s Hyper-V application and it’s only available on Windows 10 Pro. So in tandem, you need Windows 10 Pro, Enterprise, or Education to run Windows 10X on your PC.
- Currently, you can’t run Windows 10X on third-party virtual machine applications such as VirtualBox, VMware, QEMU, etc.
- Hardware virtualization support is mandatory through BIOS or UEFI.
- If you have an AMD GPU then you can’t run Windows 10X virtual machine. However, we have found a workaround and you can find the solution below.
Set Up Hyper-V
- First off, you need to enable virtualization from your BIOS settings. While rebooting your PC, you need to press the BIOS key which will open the BIOS settings page. You can find the BIOS key from our below table. If the below key is not working then look for the specific BIOS key for your PC manufacturer on the internet.

- Once you are on the BIOS page, you need to enable “Virtualization”. Every PC has a different name for the virtualization technology so look for “Intel VT-x”, “Intel VT-d” or anything on similar lines. Move between different menus and enable virtualization and save the changes by pressing the F10 key.

- Once you have done that, your computer will reboot to Windows 10. Now, we have to enable Hyper-V on your Windows 10 computer. To do so, press Windows and R keys at once to open a Run window. Now, type optionalfeatures.exe and hit enter.

- Here, scroll down and look for Hyper-V. Now, enable all the checkboxes under Hyper-V and hit the OK button. It will start installing the necessary packages and will ask you to restart the computer once the installation is done.

- You have successfully enabled Hyper-V on your Windows 10 computer. To open it, just press the Windows key once and type “Hyper-V” in the search bar and you would find the application on top. Click on it.

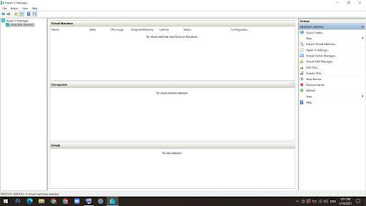
- This is how Hyper-V will look like.
- Now, you need to download the VHDX file created by thebookisclosed on Twitter. You can download the file directly in ending of the page.

- After downloading the file, extract the ZIP file and move the Flash.vhdx file to an accessible location like Desktop. I would recommend you to save it where there is ample storage available.

- Now, come back to Hyper-V and click on “New” and select “Virtual Machine” from the top-right pane.

- After that, give a name to the virtual machine. I have named it “Windows 10X”, but you can choose your own.
- Next, choose “Generation 2” and hit the “Next” button.
- After that, allot RAM to the Windows 10X virtual machine. I would recommend you to allot 3GB (3072MB) or more for better performance.
- On the next page, choose “Default Switch” from the drop-down menu and hit “Next”.
- Finally, click on “Use an existing virtual hard disk” and select the “Flash.vhdx” file by clicking on the “Browse” button.
- Finally, click on “Finish“.
- Now, this is the virtual machine that we will use to run the latest version of Windows 10X on our PC.
Run Windows 10X
- Right-click on the virtual machine and choose “Connect“.
- After that, click on “Start” and Hyper-V will start the Windows 10X virtual machine directly from the VHDX file. On the first run, it will take some time to process all the files and information.
Note: Even after 30 minutes, if the VM is stuck on a black screen then you are most likely using an AMD GPU. Go through our next guide to find a solution.
- Finally, you will be greeted with a Windows 10X boot animation.
- Now, go through all the on-screen instructions and login with your Microsoft account. You can also create a PIN during the initial setup.
- Now this is what the nearly-ready Windows 10X looks like on a single screen. It looks quite promising, right? To learn more about the final build of Windows 10X, go through our first impressions below.
- If you want to stop the virtual machine then click on “Action” at the top-row menu and choose “Turn off“.
- And if you want to delete the Windows 10X virtual machine then right-click on the VM and choose “Delete“. That’s it.
Run Windows 10X Virtual Machine on AMD GPU:
Currently, there is no way to run the Windows 10X VM without disabling the AMD GPU altogether. You will have to use the integrated GPU that comes with the Intel chipset to run Windows 10X. And yes, the performance will take a hit due to the lack of a powerful GPU. Nevertheless, if you want to taste the finalized version of Windows 10X on an AMD GPU then here is how to go about it.
- Right-click on the Start Menu and open “Device Manager“.
- Here, expand the “Display adapters” menu. Now, right-click on the AMD GPU and disable it.
- Finally, start the VM in Hyper-V Manager and this time, Windows 10X should boot fine.
Post a Comment